Stripe

Payment and Invoicing

Overview

With Stripe - Payment Link Generation Application, you can create payment links, view them, and also take certain automated actions like changing the pipeline stage of a lead or deal.

How Will It Work?

Install application:

  1. Click ‘Install App’ button on the Kylas Marketplace app Details page 
  2. Give the necessary permission required for the application and hit ‘Allow and Install’ 
  3. After the app is installed, sign up on the application with your Email account. 
  4. Verify the Email by clicking on the verification link received in Email 
  5. After verification navigate to Kylas Marketplace → Installed apps → Stripe – Payment link generation

Enter Kylas API key:

  1. After successfully installing and signing up on the ‘Stripe – Payment link generation’ application, Login to the app and click on ‘API key’ section and enter your Kylas account API key. Click here after logging in from Tenant’s account to get API key. 
Enter Kylas API key:

Connect Stripe Account:

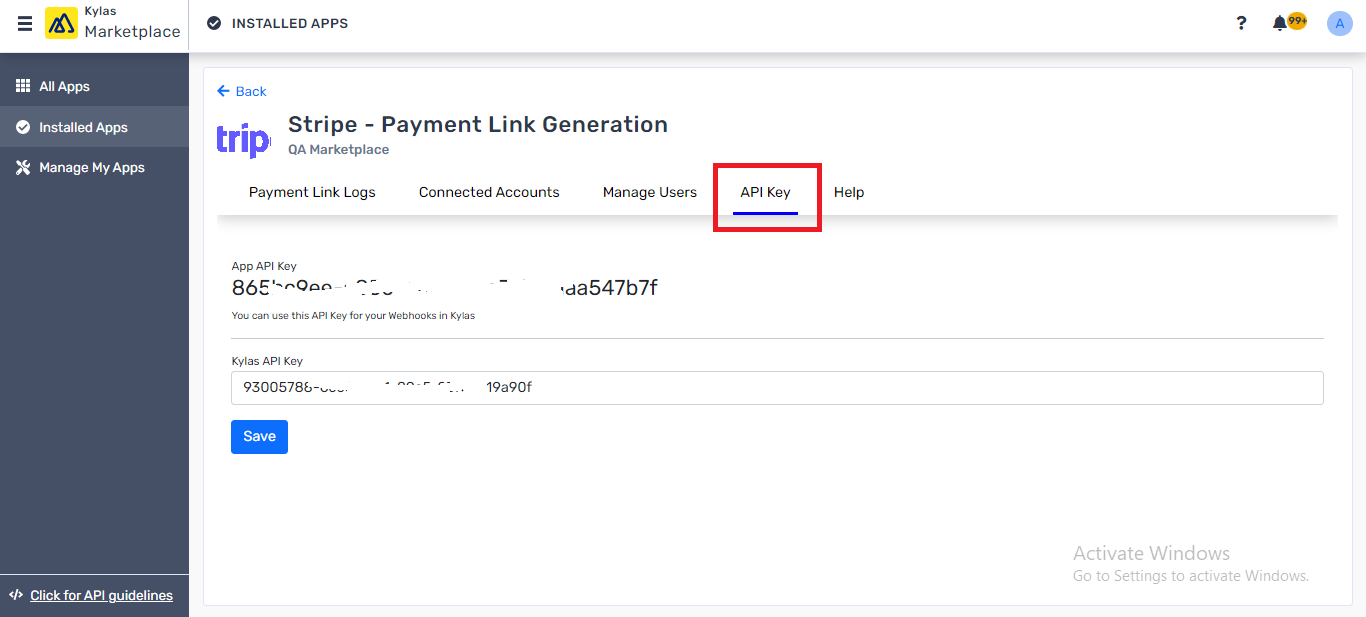
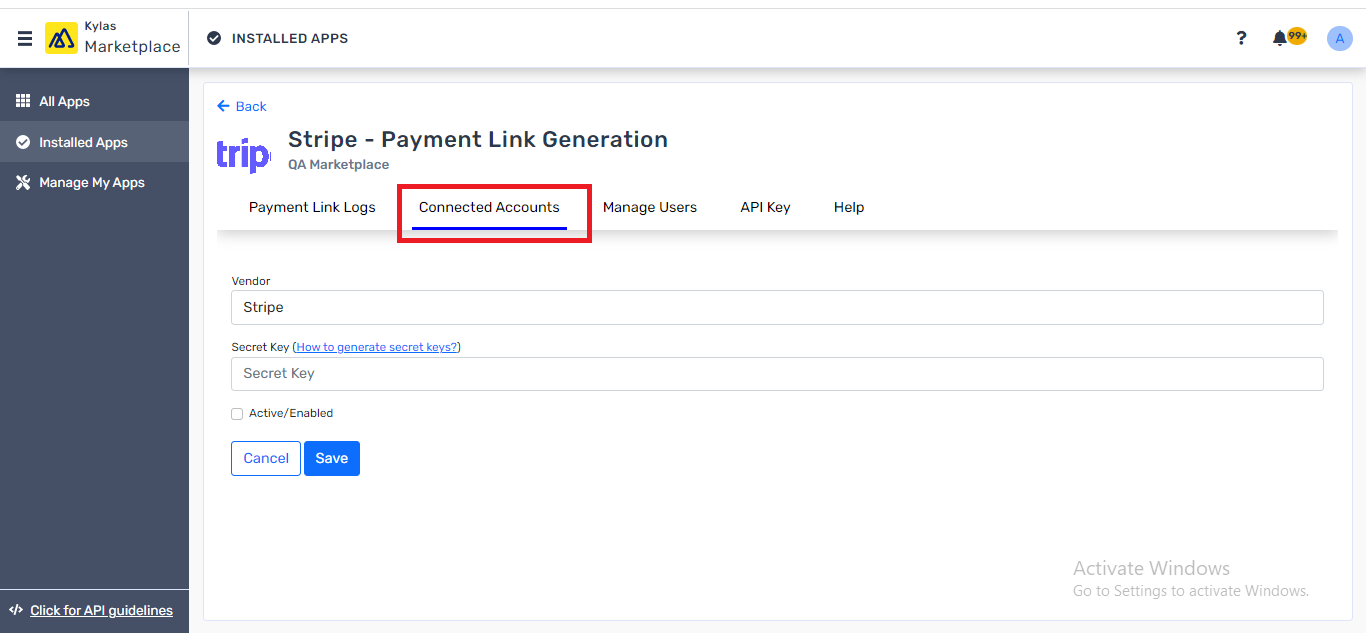
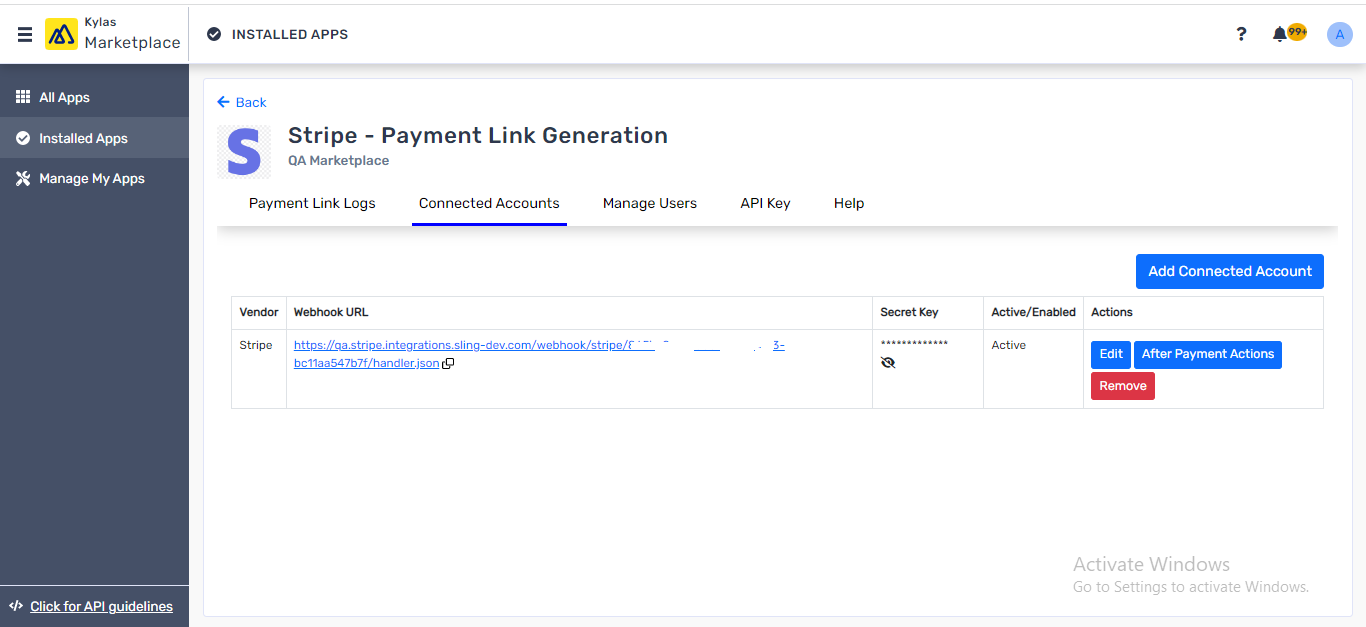
Connect your Stripe account to generate payment links by following below steps:


  1. Click on ‘Connected Accounts’ 
  2. Click ‘Add Connected Accounts’ and Enter the Stripe secret key. Click here to get Stripe account secret key 
  3. Select the Active/Enable Checkbox and click ‘Save’ 


After saving the Stripe account, we create a product with price value as 1 in your respective currency in Stripe. The product will be required to generate payment links as it’s mandatory for Stripe to have a product in the account to generate payment links

Connect Stripe Account:

Generate payment links:

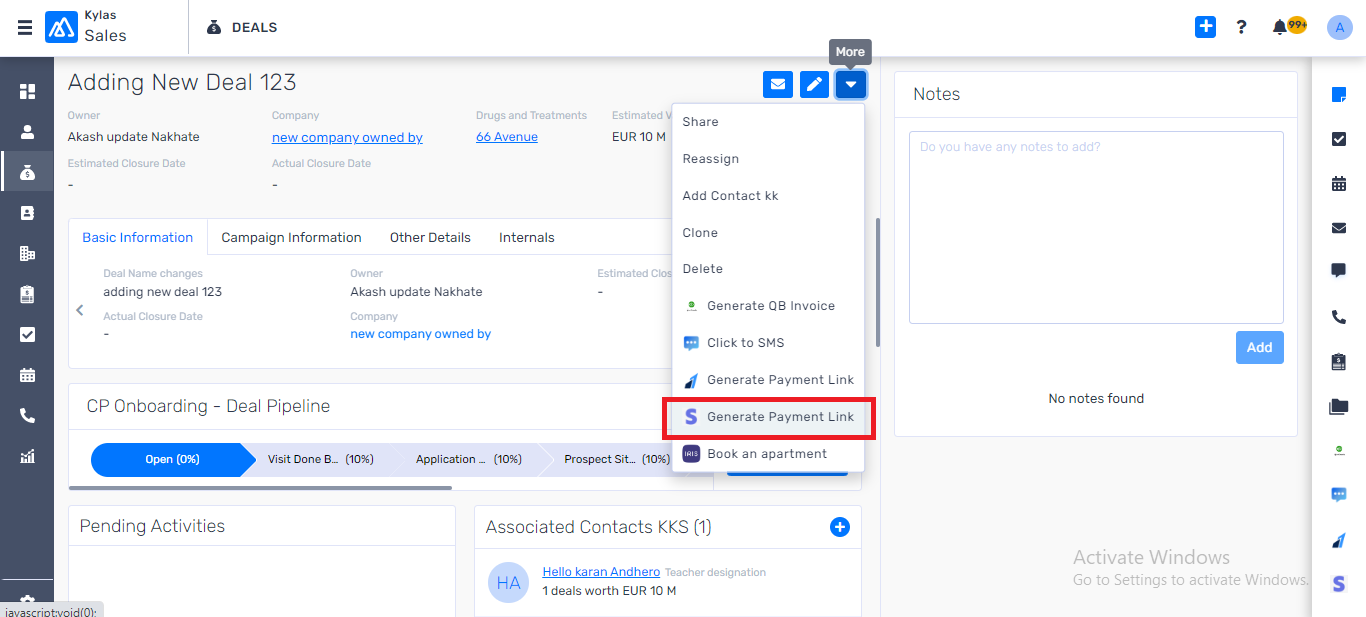
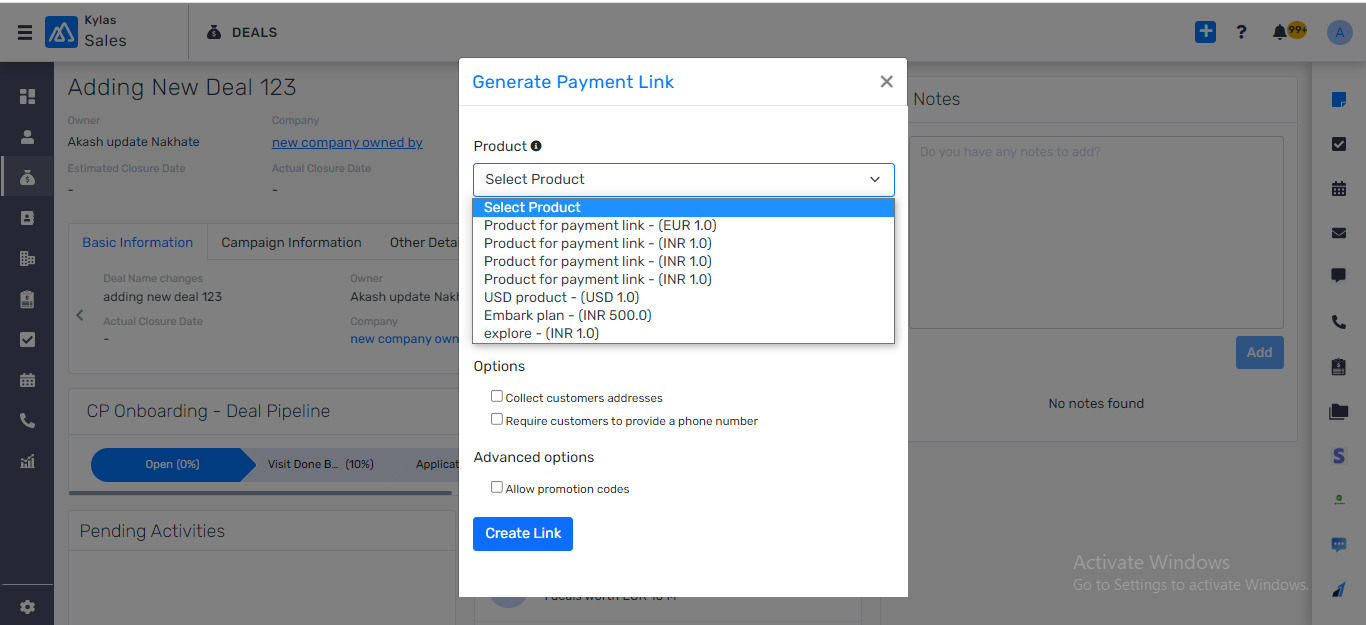
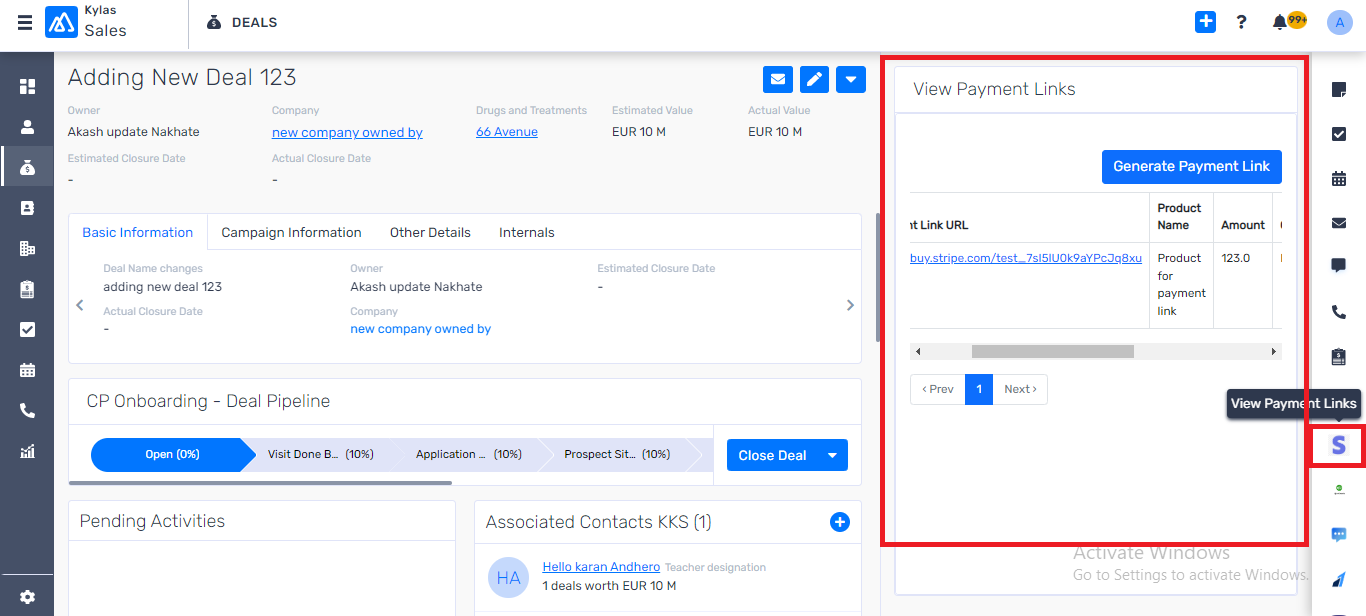
Generate payment links from Kylas for Leads and Deals


  1. After successfully connecting your account, you are ready to generate payment links 
  2. Navigate to Kylas Lead/Deals details page 
  3. Click on the more actions button show below 
  4. And click on the ‘Generate payment link’ 
  5. Choose the product for which you would like to generate link (preferred product of price value 1). Enter the quantity depending on the amount of the link you want to generate. The amount will be calculated as price x quantity. 
  6. Click ‘Create link’ 
  7. The link is generated, and it’s displayed on the same modal, you can copy and send it to the end customer. 
  8. We also create a Note saying a link with link id and amount has been generated on so and so date. 
Generate payment links:

View payment links:

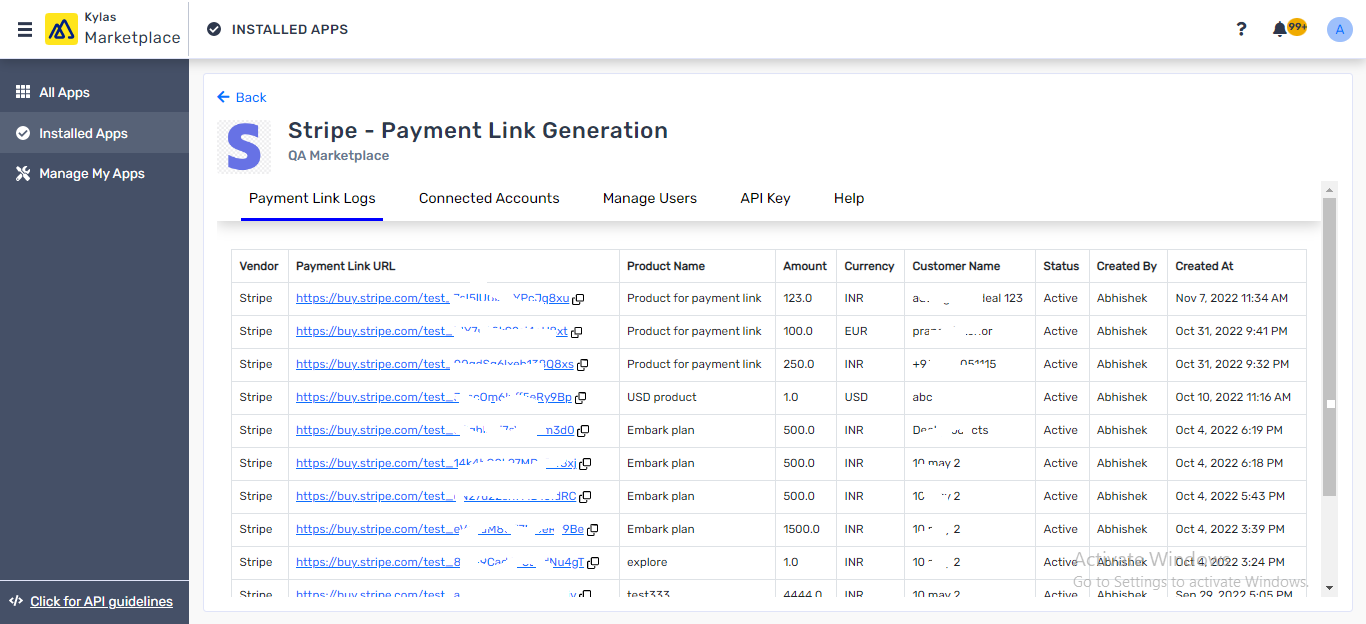
View all payment links generated in past


  1. After generating payment link, you can view the payment links by clicking on the ‘View payment link’ button on the right hand side productivity section of the Lead/Deal details page as shown below. 
  2. You can view all payment links generated across all Leads and Deals by navigating to Stripe – payment link generation app -> Payment link logs. 
View payment links:
View payment links:

Webhook setup on Chargebee portal:

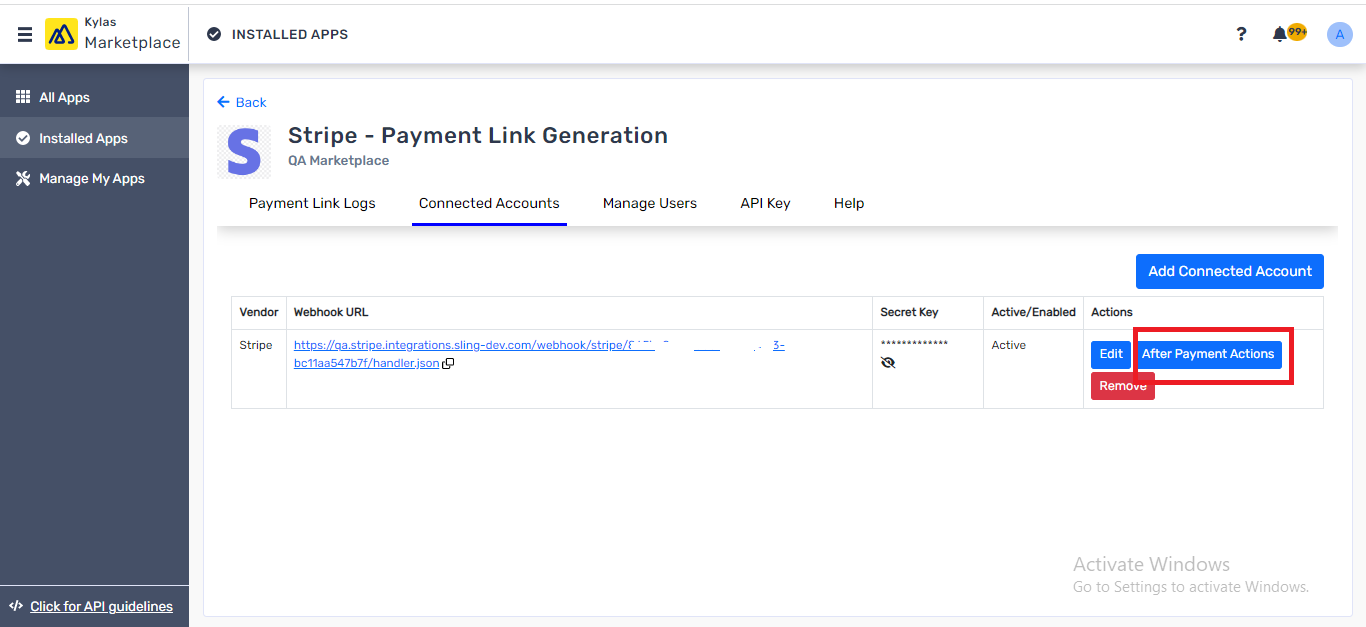
With webhooks, users can track the payment success status from Stripe for the links generated via Kylas.


  1. Login to the Stripe – payment link generation application inside the installed apps section of Kylas Marketplace. 
  2. Navigate to the Connected Account listing page, 
  3. Copy the Webhook URL displayed and add the URL at your Stripe account webhook endpoint to let Kylas know about the status of the payments for the links generated from Kylas. 
  4. Subscribe to “checkout.session.completed” event under the events available in Stripe webhooks 
  5. Click here to know about setting up webhooks on Stripe account. 
Webhook setup on Chargebee portal:

After payment action:

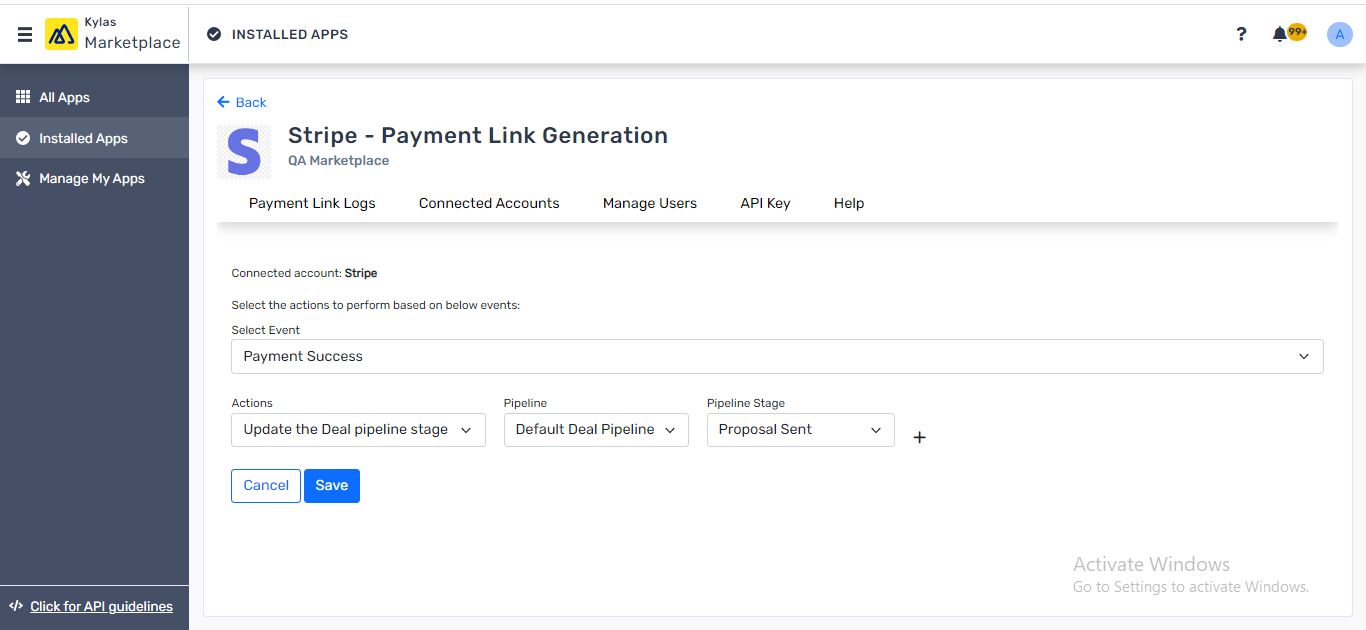
With the help of the Stripe – Payment link generation application, you can take automated actions based on the payment status, e.g., changing the pipeline stage


  1. Navigate to the ‘Connected Accounts’ page on the Stripe – Payment link generation app 
  2. Click the ‘After payment actions’ button 
  3. Choose the event from the list and desired action e.g. Deal pipeline stage change when payment is successful 
After payment action:

Manage users:

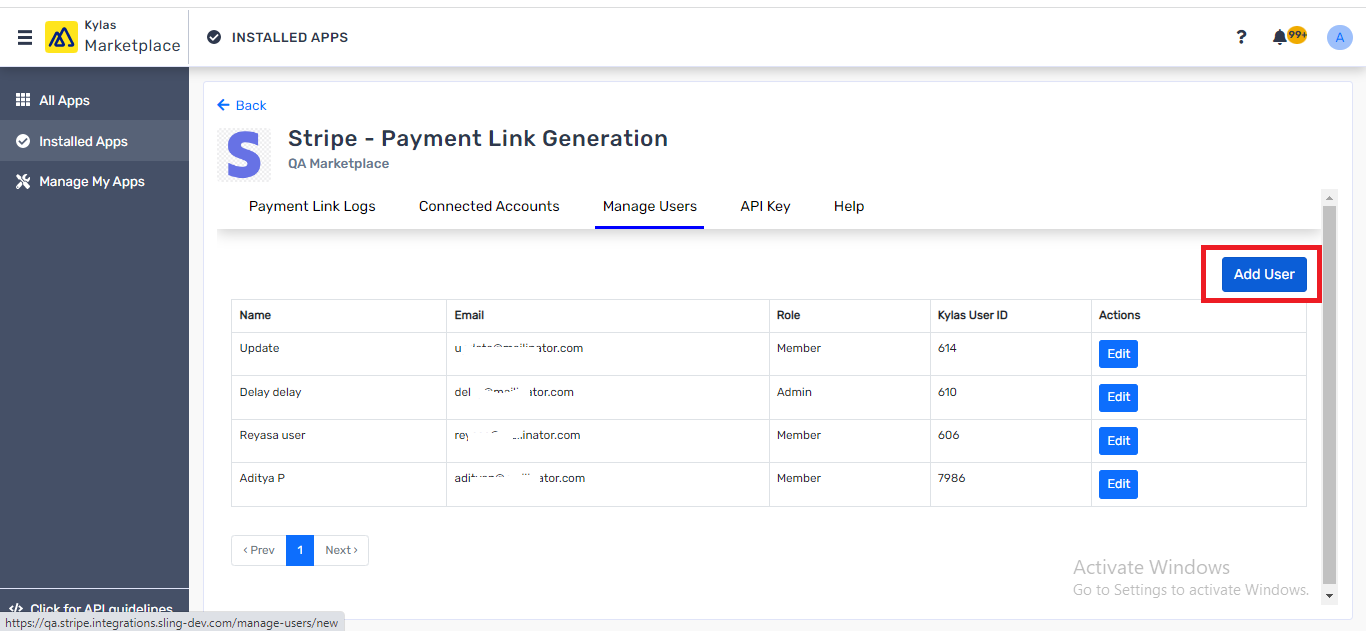
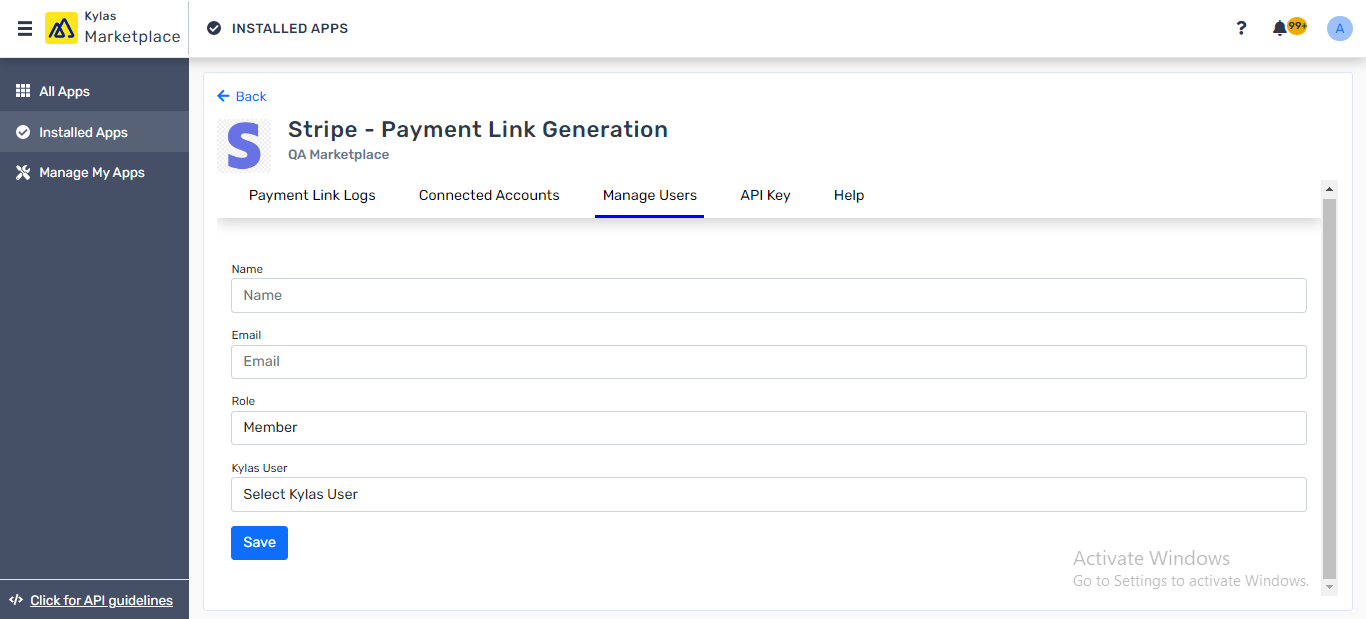
You can add your team members in the app, and they can generate the payment links to the Leads or Deals assigned to them


  1. Navigate to the ‘Manage Users’ section under the Stripe – Payment link generation application 
  2. Click ‘Add user’ 
  3. Enter the username and email to choose the Kylas user with whom you would like to map the particular user 
  4. Click ‘Save’ 
  5. An invite to the user will be sent and they can accept the invite, install the app on their own Kylas account, and login to create and view payment links 
Manage users:
Manage users:

This is how with the help of Stripe – Payment link generation application, you can create payment links from Kylas and take automated actions.

Permissions

It requests the following permissions:

  • Deal:

    Read, Read All, Update, Update All, Note
  • Products-services:

    Read, Read All
  • Contact:

    Read, Read All
  • Company:

    Read, Read All
  • Lead:

    Read, Read All, Update, Update All, Note
  • User:

    Read, Read All
  • Pipeline:

    Read, Read All
  • Search List:

    Read
  • Note:

    Read, Read All, Write
Kylas mnemonic Kylas mnemonic Kylas mnemonic