


Overview
Shopify Marketplace App, a powerful tool designed to streamline lead generation and customer tracking for your Shopify store. This app allows you to effortlessly create leads, contacts, and deals in Kylas whenever customers visit your Shopify store. By using this app, you gain the ability to monitor all store visitors, potential customers, and order details in one convenient location - Kylas.
You can automatically create leads in Kylas when a customer signs up for your Shopify store. Furthermore, the application will create contacts and deals in Kylas each time a customer adds a product to their shopping cart. This ensures that you can keep track of your potential customers and their purchase activities, empowering you to optimize your marketing strategies
You can automatically create leads in Kylas when a customer signs up for your Shopify store. Furthermore, the application will create contacts and deals in Kylas each time a customer adds a product to their shopping cart. This ensures that you can keep track of your potential customers and their purchase activities, empowering you to optimize your marketing strategies
1. Steps to Install the Application
-
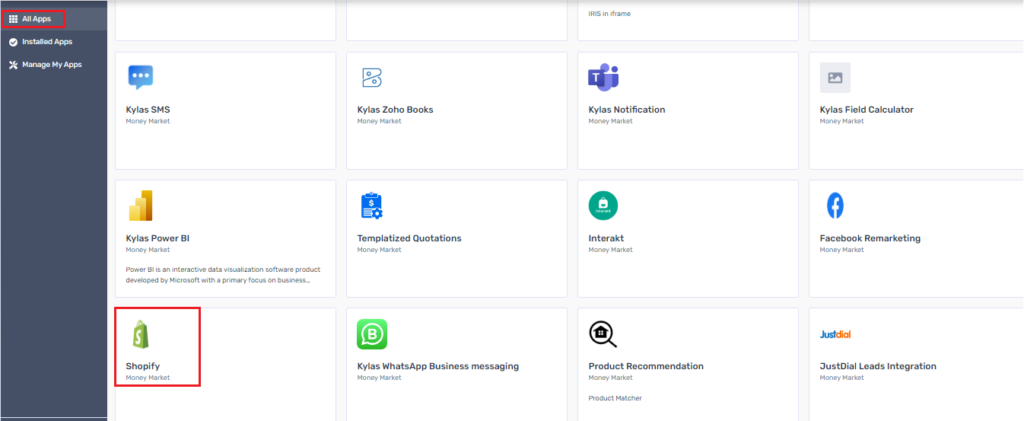
- Locate the Shopify app in the Kylas Marketplace
- Click on the ‘Install App’ button
- Click on the ‘Allow and Install’
- After installation Sign-up for the app
- Verify your email to login the app and enter the Kylas API key
- Navigate to ‘Installed App’ and click on ‘View Details’ for the Shopify app.
2. How to Connect Shopify Store:
- Login to Shopify marketplace app
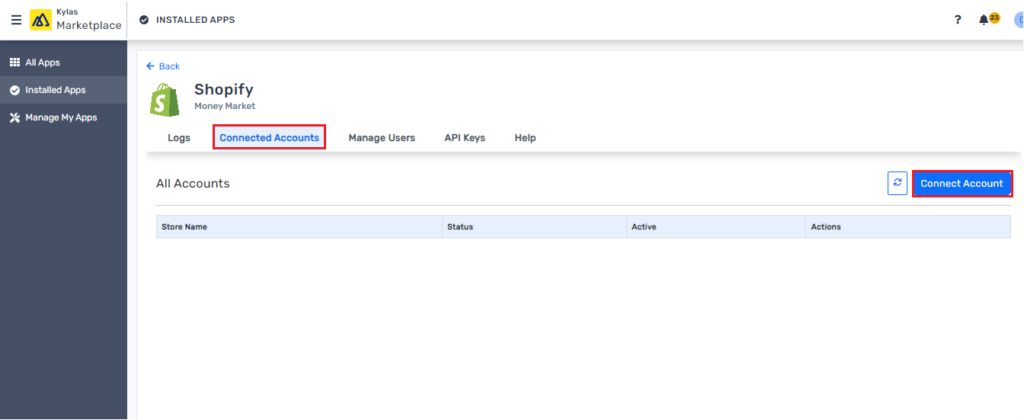
- Navigate to the ‘Connected Account’ section and click on ‘Connect Account’ button.
- Enter the Store Name and Access token of the store to be connected [View the hyperlink to know how to get the Store name and Access Token]
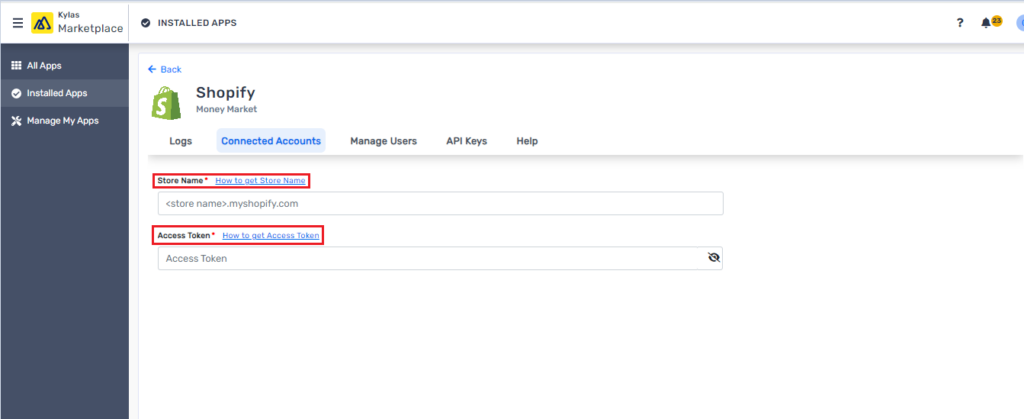
- Click on the Save button available at the bottom of the screen to connect the account.
- When saved the Shopify Store will get connected to Kylas CRM.
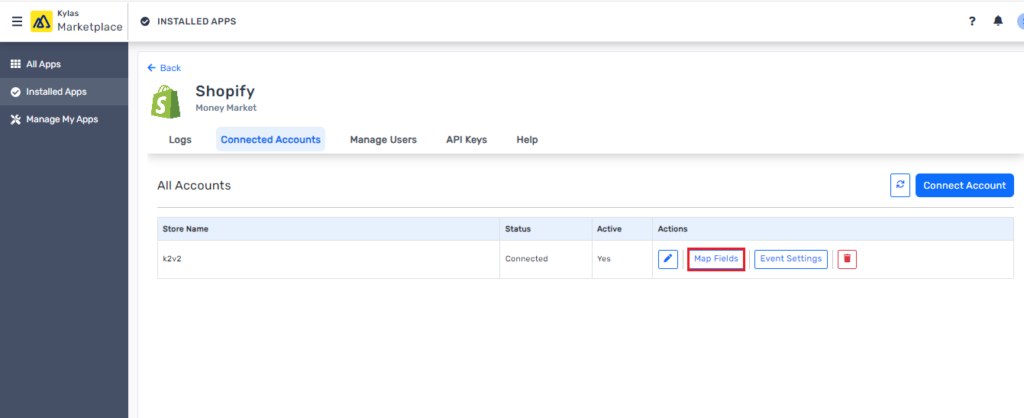
3. How to Map Shopify fields with Kylas:
- Go to Connected Accounts to view the Map field options
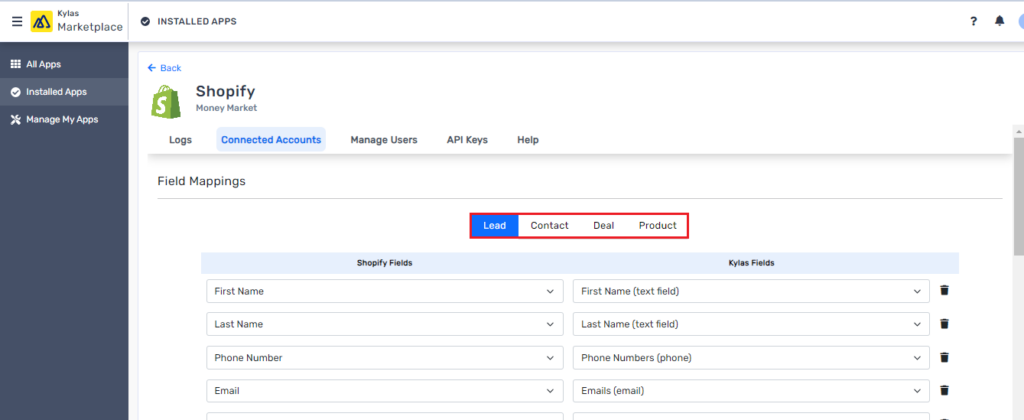
- Click on the Map Fields to view and map the Shopify fields with the Kylas CRM fields to flow the data from Shopify to Kylas in right place.
- Map all the required fields for the record type Lead, Deal, Contact, and Product [Note: the app will already have a few fields mapped] Also you can map the additional fields of Campaign Information to store additional data.
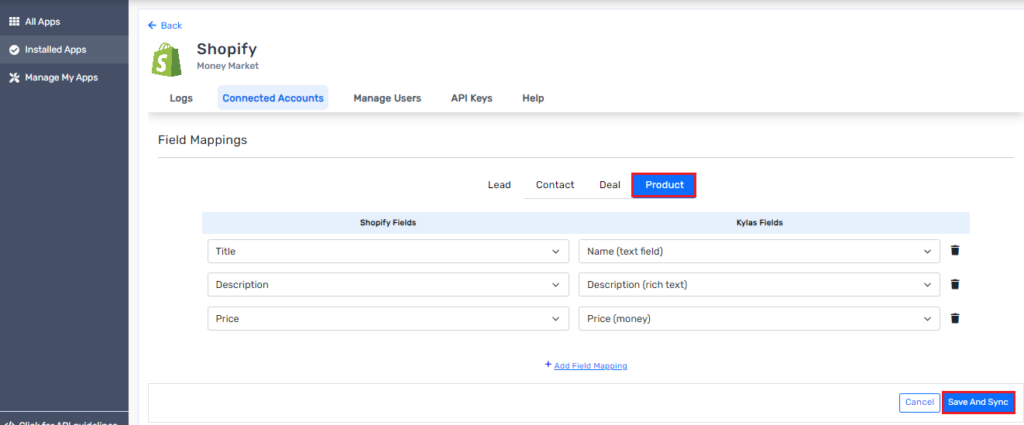
- On the Product tab, map all the fields and click on Save & Sync to sync/copy all your Shopify products in Kylas.
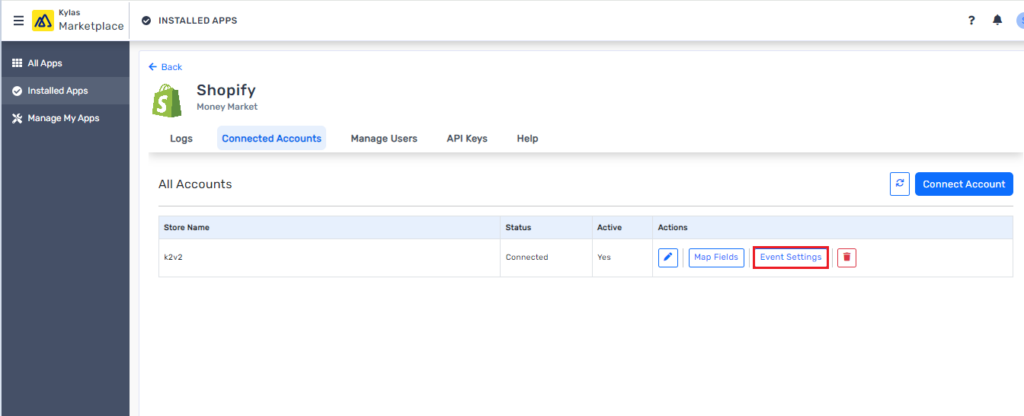
4. How to Set Event Setting:
- Setting an Event in the App will allow you to perform certain actions in Kylas based on different events happening in your Shopify store, such as the below events and more.
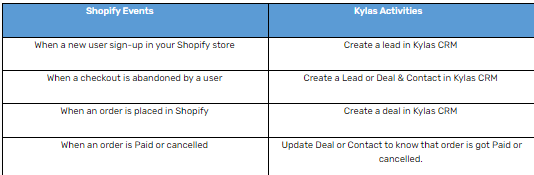
- To set the events, click on the Event Settings available in Connected Account tabs to set the strategy of what should happen in Kylas based on a Shopify event [E.g., When an Order is placed in Shopify Then Create a Contact & Deal in Kylas]
- Select the Shopify event and Activity in Kylas from the respective drop-down and save it. Also view all your event details at the bottom of the screen.
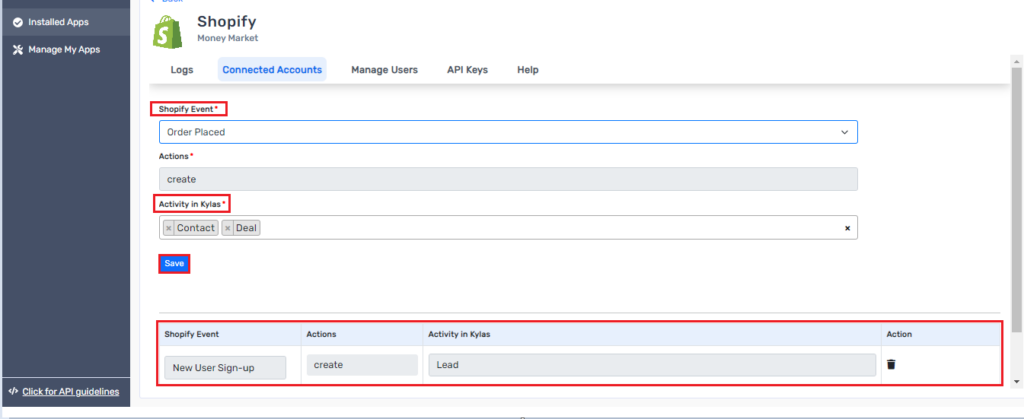
- Upon all the setup, whenever an event happens in the Shopify, the Activity set for Kylas will take place [E.g., When an Order is placed in Shopify Then Create a Contact & Deal in Kylas]
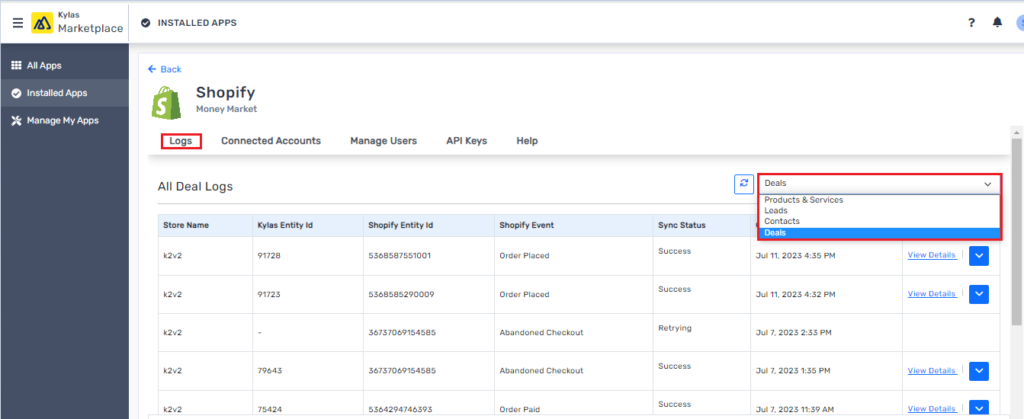
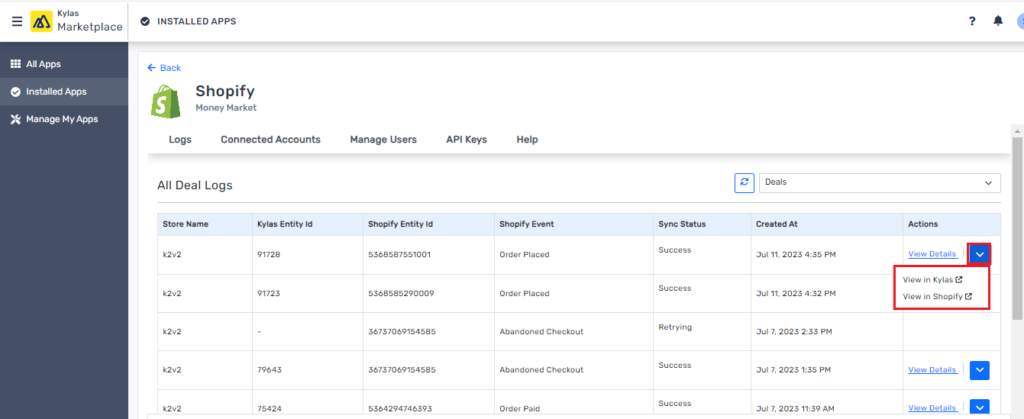
- Track all the event related logs in the Logs tab to view the event details such as Kylas record ID, Shopify record ID, Shopify Event, Sync Status and Time also, switch between different record type with a simple drop-down
- Click on View Details link to see the synced information in more details.
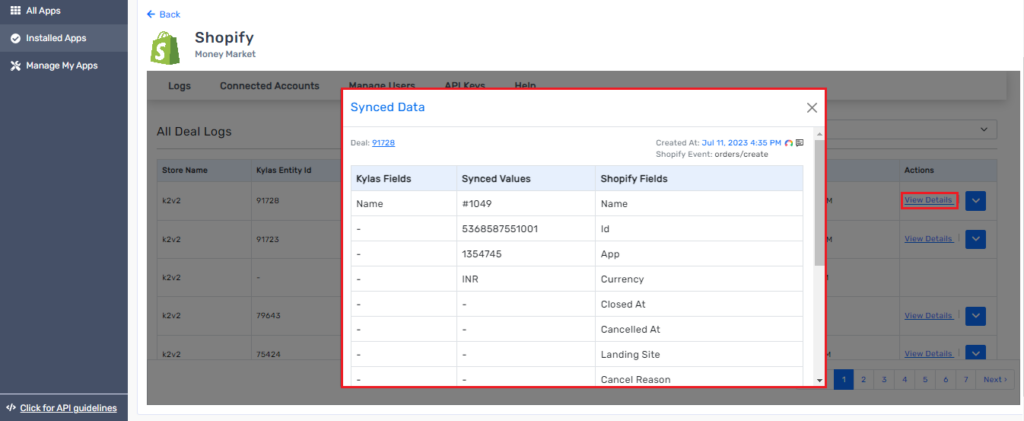
- Get redirected to the specific record page with help of redirection menu available in more menu to view it.
5. How to add users in the App:
- Navigate to the Manage User tab
- Click on Fetch Users button
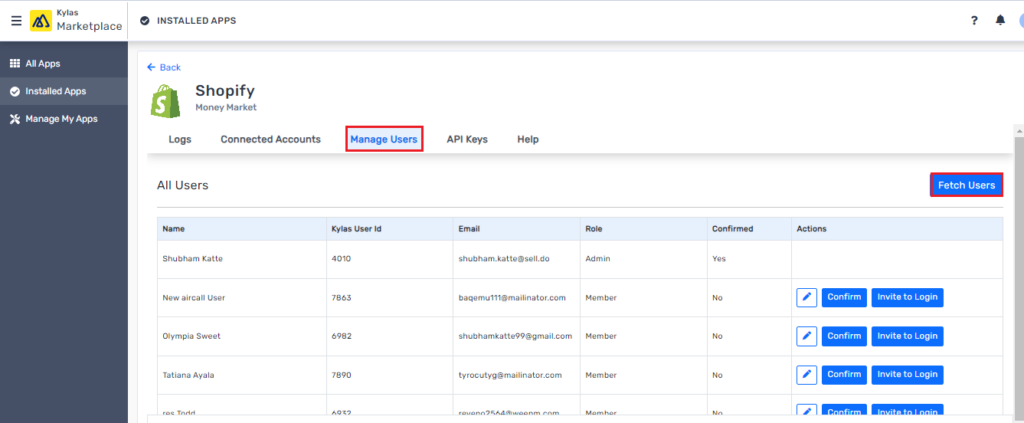
- This will fetch all the active users available in your Kylas account
- Choose the different actions available for each user.
- Pencil button - Edit the user profile.
- Confirm – Confirm the user’s Marketplace account on behalf of the user. Upon confirmed the user will need to do Forget Password by installing the app to generate a login password.
- Invite to Login – Sends an email verification link to user’s email. The user will need to verify and activate the account by putting a password.
- The users who have as an ‘Admin’ role on the app, will be able to view all menu items in the application such as Logs, Connected Accounts, Manage Users, API Keys.